Open any browser and go to the download page from the Download Link
It will show you the below screen:
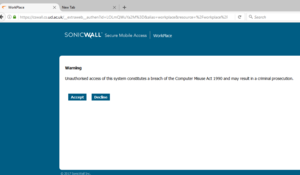
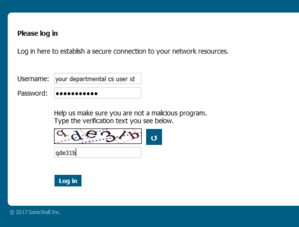
Please accept the fair usage policy and login using your CS Departmental Windows username.
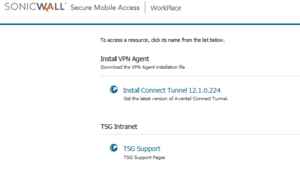
Once you login, you can see the link to download the client by clicking on the link Install Connect Tunnel 12.1.0,224 as shown below:
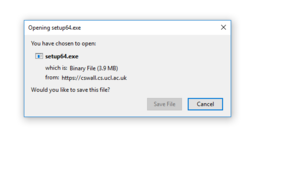
Save the setup file and double click on it from the saved location:
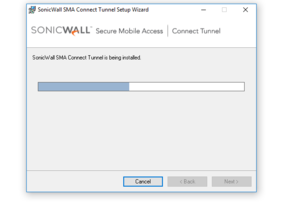
Once you double click it will start installing.
Windows 10 Users
If you double click on the shortcut on the Desktop called SonicWall VPN Connection, it will display a client similar to the one in the picture below. Please double click to open and configure it.

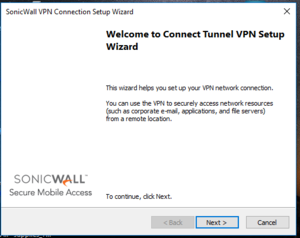
Once you open the client it will display a welcome page as shown below. To continue please click Next:
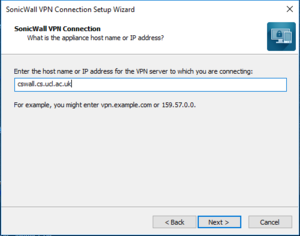
Enter the hostname of the VPN server as cswall.cs.ucl.ac.uk and click Next.
Please select or enter your login group as Staff or Student.

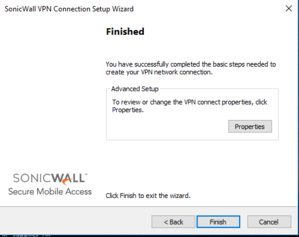
One its configured, click on Finish.
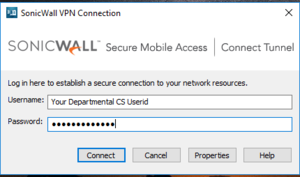
Once you click on Finish it will ask you for your username and password. Please enter your CS Departmental Windows username.
Note: This username is provided by TSG in the Department of Computer Science (can also be referred to as user-id). Please email request@cs.ucl.ac.uk if you need a CS username. Do not be confused with your main UCL username that is provided to you by HR (or ISD).
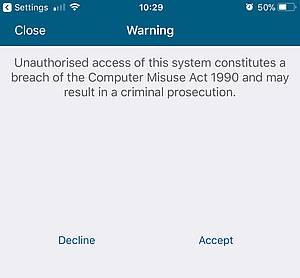
Please accept the fair usage warning as shown below:

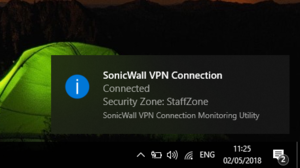
Once you enter your username you will be connected and will see something in the system tray on the right-hand side bottom corner similar to:
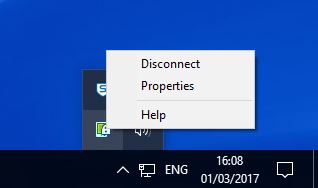
Once you’ve finished using the VPN you can disconnect by right clicking on the tray icon and selecting disconnect as shown below:
Please download the Mac OSX VPN client installer from the Apple Store follow the instructions as in the pictures below:
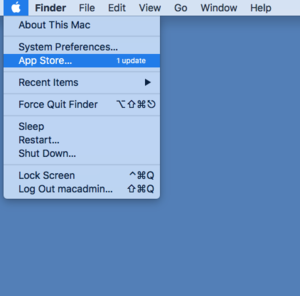
Go to the App Store from the Apple Menu
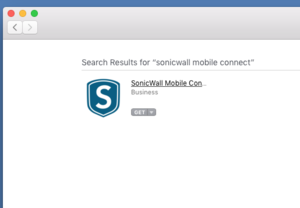
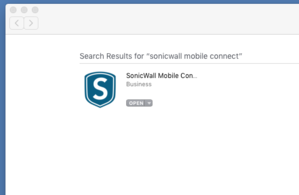
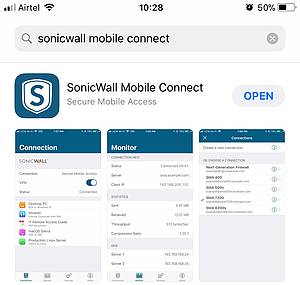
Search for SonicWall Mobile Connect
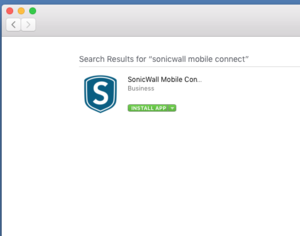
Once you find the App click on Get and Install App
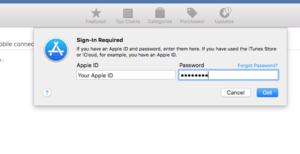
Enter your Apple ID and Password to install the App.
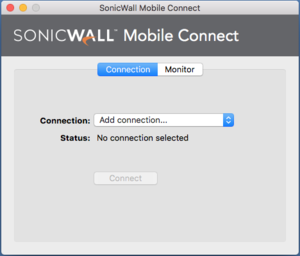
After the installation Open the App from the Open link in the App Store or Go to Applications folder and open the SonicWall Mobile Connect App
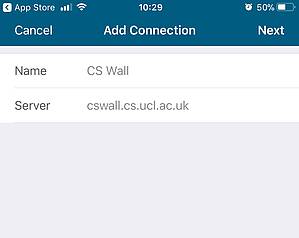
Once you open the App you would need to Add Connection under the Connection Tab
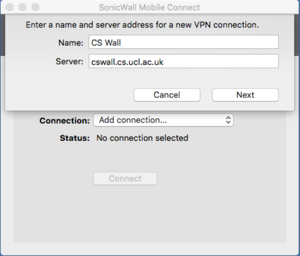
Enter the Name and server details of the new VPN Connection and click Next.
Name: CS Wall
Server: cswall.cs.ucl.ac.uk
Please click on Allow for the configuration to be added to the Mac as show below:
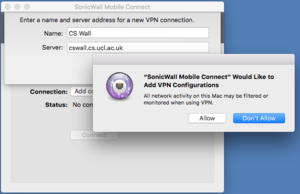
Note: This message may not pop-up on all the Macs, so please do not panic if you do not see this screen. Just follow up the configuration from the following steps.
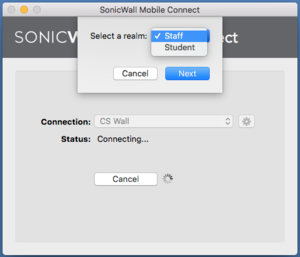
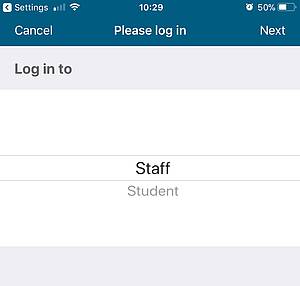
Once you allow the configuration, the VPN client will make a connection attempt and it will ask you to select a realm. Select the appropriate realm and click Next to proceed.
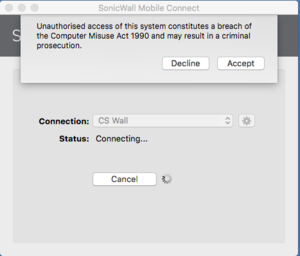
Accept the usage policy:
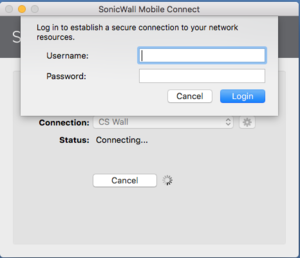
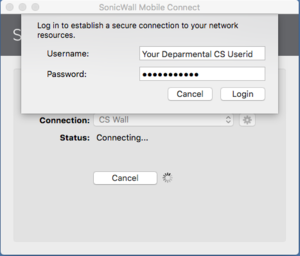
It will now prompt you for your username and password, please enter your Windows departmental CS username and password. These should have been provided to you by TSG (Room 4.20, Malet Place Engineering Building):
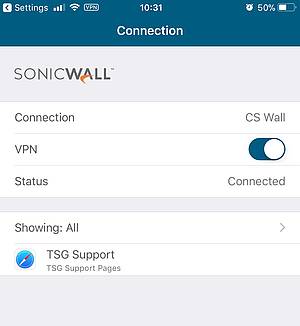
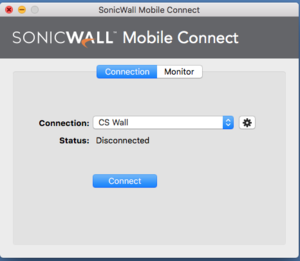
You should see the status as Connected once it is successfully connected.

If you want to disconnect, please go to the Sonicwall mobile connect icon on the top right hand corner, click on it, and select Disconnect
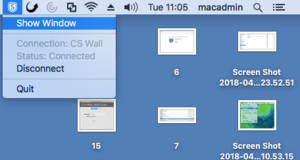
The status should now show as Disconnected.
Below screenshots have been taken on CentOS.
Download Link for the latest Linux Client
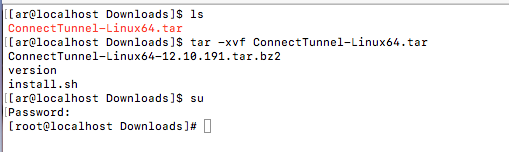
Once you download the tar ball from the download link, you need to extract and install the client.
Install:
Please use the below commands in order for uncompressing and installing the client.
Once downloaded you can see the tar file in your downloads folder:

You need to be root so use the “su” command to switch to the root mode and use the command:
tar -xvf ConnectTunnel-Linux64.tar
to extract the files to the current directory.
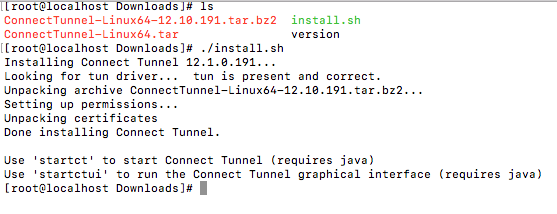
./install.sh to install the connect tunnel
To initiate the connection process, plese use the command:
startct cswall.cs.ucl.ac.uk
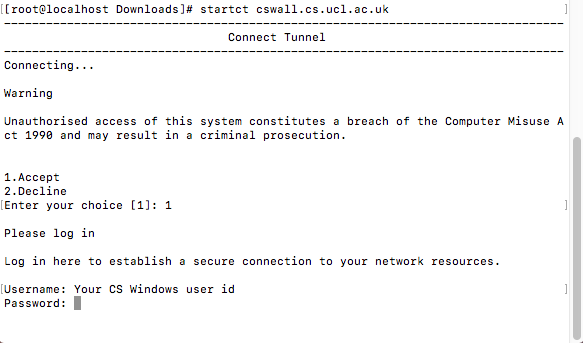
Please select your choice depending on whether you are a student or staff
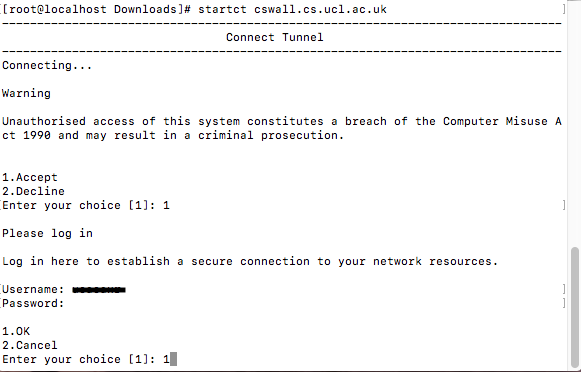
Press the return key (enter key) or type 1 to select OK and you will get connected to the VPN.
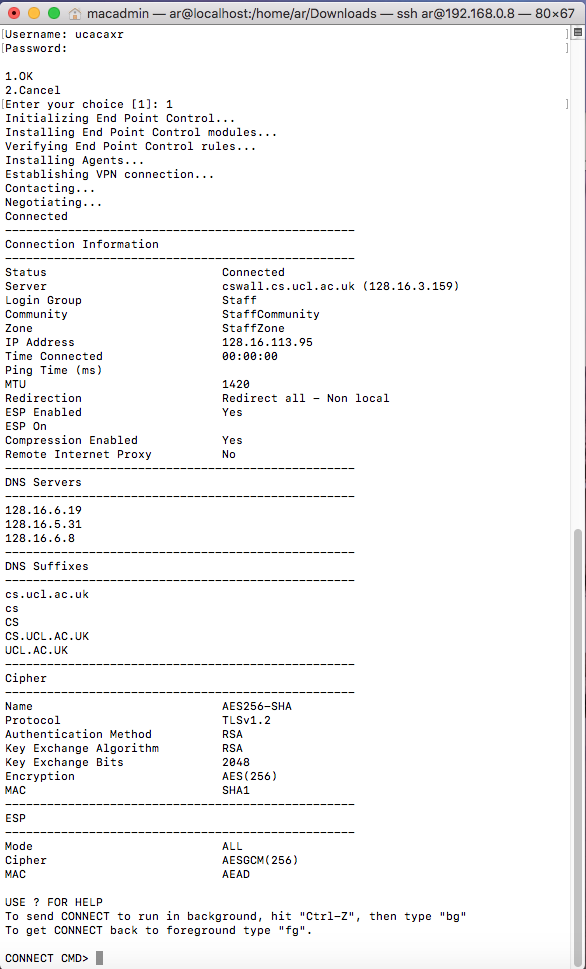
Type bye on the command line to disconnect if you wish to disconnect.
![]()
Uninstall:
Just go to the uncompressed folder (usually /usr/local/Aventail unless you have chosen a different folder)
Type ./unistall.sh and enter to uninstall the Connect Tunnel

Please download the appropriate client on your mobile device from the App Store (either the Apple Store, Google Play Store or Microsoft Store). Some of the links below can help you to download the right installer for your device:
On your mobile device you can go to the relevant app store and search for SonicWall Mobile Client or just Mobile Client and the app store will show you the client as shown:
Once downloaded and installed, open the app and it will display the client:

Select Add connection and add the Name as CS Wall and Server as cswall.cs.ucl.ac.uk
Then please select the login group as either Staff or Student as shown below:
Now it will prompt you for a username and password:
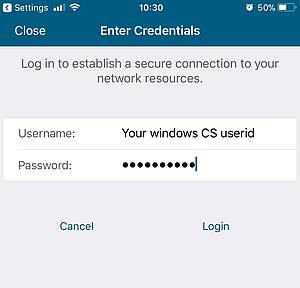
Enter your CS Windows username and password.
Accept the warning message:
Once you enter your username and password click on Login. You will then see your connection status: